

OJeep
-
Aantal bijdragen
5 -
Geregistreerd
-
Laatst bezocht
OJeep's Achievements
")
Newbie (1/14)
0
Waardering in de gemeenschap
-

Jeep Grand Cherokee WJ: verhogen/banden/lier
topic reageerde op een OJeep van OJeep in Grand Cherokee (ZJ & WJ) Technisch Forum
Dank! Ik heb de files nu naar een vriend gestuurd die veel met Autocad werkt dus ik hoop dat het goed komt. Anders laat ik het je snel weten! -
Jeep Grand Cherokee WJ: verhogen/banden/lier
topic reageerde op een OJeep van OJeep in Grand Cherokee (ZJ & WJ) Technisch Forum
Zojuist binnen gehaald: Na betaling krijg je de link en beschrijving: (let wel, hierbij ook 3 z.g. DWG bestanden (CAD files) die niet zomaar uit te lezen zijn. Ik laat die nog uitprinten want mijn MAC leest ze niet... Attached you will find the layout and measurements necessary for this product in the form of 2D CAD files (nested format for CNC cutting), a 3D CAD file for assembly guidance, and a printable PDF parts list (with dimensions) for hand cutting and assembly. We recommend a minimum of 3/16” steel on all bumper parts unless otherwise specified. Most brackets will have a recommended thickness of 1/4” and will be noted on these part drawings. Each part can be cut by hand using a few simple tools: Tape Measure Paint Pen, Sharpie, or Silver Pencil T-square (or other straight edge) Cutting Tool (Plasma cutter, band saw, angle grinder) Angle Finder The first step is laying out your parts on a clean, rust-free piece of steel. We recommend cleaning your steel before cutting any parts. Begin with a straight edge of a part and mark your measurement on the plate. Proceed around the piece using the provided angles and measurements until the part is properly marked. Once parts have been drawn on the steel, proceed to cut out each part. It is best to clean each edge of all parts prior to assembly to ensure clean welds and good penetration. Assemble the parts in the arranged pattern according to the parts list page. If cut and arranged properly, each part should match up with adjoining parts to create the proper angles. Should a question arise about the proper placement or angle of part, please contact us and we will be happy to assist by answering any questions. Assemble parts by tack welding them into place. Make adjustments as necessary. Before welding parts together, test fit the product on your vehicle to ensure proper fitment. Some people prefer to weld the product together while mounted on the vehicle. If you chose to remove the product from the vehicle before welding, be sure to secure the product firmly to a welding table to prevent movement of parts due to heat. To prevent warping, alternate welding on different sides of the product and allow parts to cool before welding again. After welding is complete, proceed to clean up the product using wire wheels, sanding discs, and grinding wheels. Please note that it is your responsibility to add bracing and support gussets as needed, and that the thickness of steel you use is strong enough to retain stability during use. You may use this product at your own risk. We are in no way responsible for any damage, injury, or death that may result from the construction or use of this product. Thank you for purchasing our product. If you have any questions or comments, please contact us via email at sales@flatland4x4.com. -
Jeep Grand Cherokee WJ: verhogen/banden/lier
topic reageerde op een OJeep van OJeep in Grand Cherokee (ZJ & WJ) Technisch Forum
Hier het adres: kost inderdaad 30 of 35 Dollar: -
Jeep Grand Cherokee WJ: verhogen/banden/lier
topic reageerde op een OJeep van OJeep in Grand Cherokee (ZJ & WJ) Technisch Forum
Dank voor de adviezen! Ik heb de tekeningen gevonden en ga kijken of dit maakbaar is... -
Jeep Grand Cherokee WJ: verhogen/banden/lier
een discussie voegde OJeep toe in Grand Cherokee (ZJ & WJ) Technisch Forum
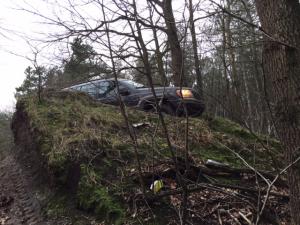
Even voorstellen: Olav en sinds een dik jaar eigenaar van een Jeep Grand Cherokee WJ (1999) 4.7 V8. Nu is mijn doel er mee te gaan greenlanen/outdoor rijden. Dat gaat in de standaard uitvoering al aardig maar blijf toch regelmatig in de blubber steken. Hiervoor moet ik dus wel wat aanpassen... Om het " wiel" niet opnieuw uit te hoeven vinden graag jullie advies tav: 1- Verhogen: kan dat met een simpele verhogingsset? zoals http://grandcherokeeparts.nl/grandcherokeeparts/index.php?cattype=P&hoofdcategorie=_NEWPARTS_CHEROKEE&subcategorie=580&productid=6721 of is dat onvoldoende? 2- Wat is de maximale bandenmaat die er (goed) onder past? Ik wil de BFGoodrich Mud Terrain T/A KM2 er onder leggen. Dacht aan de maat 265/75/R16 3- Suggesties voor goede (en niet te dure) bumper met lier? Alvast dank voor de hulp!